Paper Cup Groundhog
By Hannah
1. Get a paper cup. It can be any color, but you have to make sure it's the size you want.
2. Next, get a large piece of paper. You can paint or use markers and pencils to color the sheet of paper.
3. Once you're done coloring most of the paper, cut out a rectangle that has a width of how tall the cup is, and will be long enough to wrap around the bottom part.
4. (OPTIONAL) You can draw hands or feet for your groundhog with pencil or markers.
5. Cut out four identical circles that all have one side with color on it.
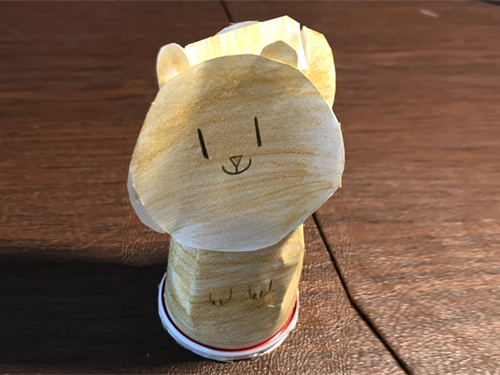
6. Pick one circle and draw a face on it. The face doesn't have to be realistic, but you can choose to draw harder things if you want to.
7. Cut out a small circle. Cut the circle in half so you have two semicircles.
8.on the other side of the big circle with the face, tape (or glue) both semicircles in position as ears.
9. tape the sides of all four big circles together, then measure how big the hole on the top is.
10. Now, cut out a square, circle, or any shape you need to fill the hole in the top.
11. tape the shape to the tops of all four circles so it covers the big gap.
12. (OPTIONAL) for the bottom paper cup, you can trace the hole and cut out a circle to fill that gap and tape in onto the bottom rim of the paper cup.
13. Lastly, tape the bottom parts of all four big circles for the head onto the paper cup.
14. Congratulations, you have completed the paper cup groundhog! you can add extra accessories and more.
Don't forget to share crafts with friends and family and explore the rest of Sparky!